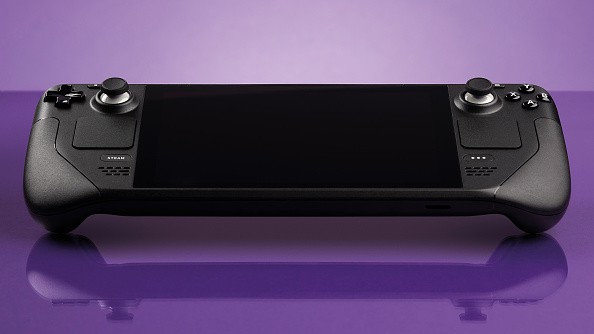
The Steam Deck is a powerful little console that's been winning the hearts of a lot of PC gamers these days, especially at a trying time when PC hardware is just stupidly expensive. But if you really want to turn the Steam Deck into a true gaming PC, you can install Windows on it.

A Steam Deck handheld gaming console, taken on August 26, 2021.
This guide will help you do just that. But be warned: if you own the cheapest version of the Deck (the one with the 64GB storage), you're going to need some more storage space than that. Otherwise, the higher-end versions will go with this guide just fine.
BIG DISCLAIMER: if you install Windows on your Deck, there is NO OPTION TO GO BACK to SteamOS as of yet. Furthermore, Windows isn't exactly running like a dream on the Steam Deck yet, so proceed with caution. If you feel like it is not worth the risk, TURN BACK NOW.
Now that's out of the way, let's get cracking!
Step 1: Create Windows Installation Media
To perform this step, you're going to need a few things: a USB Type C drive, or a combination of a basic USB drive and a USB type C hub/connector. Once you have either of these, use a PC to visit this Microsoft link and pick Windows 10 for now.
Download the Media Creation Tool and follow the onscreen instructions to create a bootable drive. It might take a few hours, so be ready for the wait.
Step 2: Turn Off Your Steam Deck Completely And Plug In The USB Drive
If you already have a USB Type-C drive, all you need to do is plug it directly into the Deck's USB-C port. But if you don't have one, connect your USB-C hub and plug in your basic USB drive that way.
Read also: 'Genesis Noir' Astronomy Update Adds Three New Levels for Free
Step 3: HOLD DOWN The Volume Button And Turn The Power On
Doing this will give you access to the device's boot menu. Using the Deck's D-Pad, pick the option EFU USB Device then press A to select it. After this, the device will boot up and show the Windows installer sideways. You have the option to use a mouse and keyboard (if you have a USB hub connected), but otherwise, you can just use the touchscreen.
Step 4: Follow The Onscreen Windows Installation Instructions
Windows installation is quite straightforward, so all you have to do is just follow the onscreen instructions. Don't forget to agree to Terms and Conditions whenever you're prompted to continue.
Step 5: Delete SSD Partitions
You will notice that the Steam Deck's SSD is split into a total of eight partitions. Delete Partition 8, which is the largest.
Step 6: Pick Drive 0 Unallocated Space And Click/Tap Next
After picking the Drive 0 unallocated space option, click/tap Next and Windows will begin installing. It might take several minutes, but eventually, you'll see the Windows setup screen where you'll pick your language, region, etc. Just follow the onscreen instructions.
Step 7: Fix The Screen Orientation In Display Settings
You might notice that the Windows screen is still sideways, but that's an easy fix. Go to Start > Settings > System > Display, then scroll down to Display Orientation. Pick Landscape. And voila! You now have Windows 10 installed on your Steam Deck.
Why You DO NOT WANT WINDOWS On Your Steam Deck
The Steam Deck is that kind of device that screams, "if it ain't broke, don't fix it." While some games won't even run with its default SteamOS, sticking to Valve's operating system is still the BEST choice until the underlying issues with running Windows on the Deck are fixed. Here are some of the noticeable problems shared by YouTuber TheTerk. Go to the 1:13 mark:
Related: Recent Nvidia Hack Exposes Leaked Nintendo Switch 2 Specs | Here's What to Look Forward
Story posted on GameNGuide
Written by RJ Pierce


